
Introduction to Marble Effect
The composition of Mithila paints is unique, incorporating natural binders like gum Arabic and resins, which facilitate their application on various surfaces. Historically, artists have utilized these paints on walls, floors, and handmade paper. In contemporary settings, Mithila paints have expanded their reach to canvas, fabric, and even ceramic surfaces. Their adaptability makes them an excellent choice for artists seeking both authenticity and versatility in their work.
The cultural significance of Mithila art is profound, often depicting mythological tales, nature, and daily life, with each painting telling a unique story. These artworks are characterized by their fine lines, intricate details, and vibrant colors, which are quintessential to Mithila painting. The traditional role of these paintings extends beyond artistic expression; they are integral to various cultural rituals and celebrations, symbolizing prosperity and good fortune.
Preparation for using Mithila paints in modern applications involves meticulous surface treatment to ensure paint adherence and longevity. For instance, when applying on canvas or fabric, a gesso primer might be used to create an appropriate base. On ceramic and wooden surfaces, a thorough cleaning and sometimes sanding are necessary to achieve a smooth and receptive foundation. This attention to preparation ensures that the stunning effects of Mithila paints are long-lasting and resilient, maintaining their vividness and detail over time.
Understanding the legacy and methodical preparation of Mithila paints is crucial for artists who wish to explore and experiment with these traditional materials, blending historical techniques with contemporary creativity. The natural origin, vibrant aesthetics, and cultural depth of Mithila paints make them an invaluable asset in the realm of artistic expression.
Understanding the Marble Effect
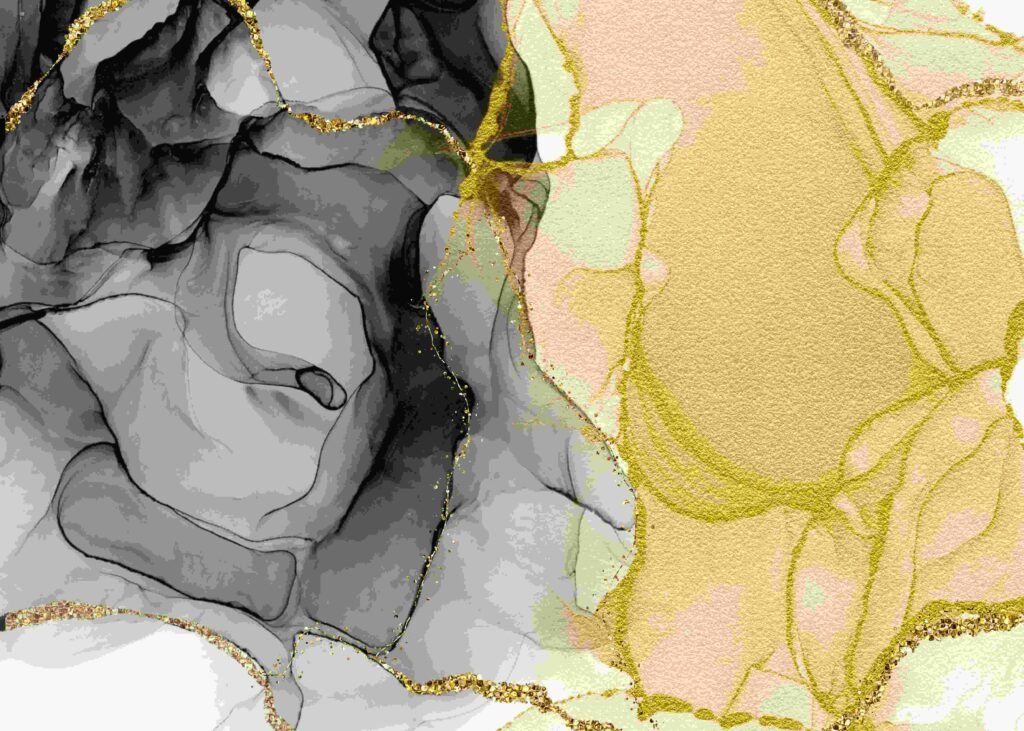
The marble effect is a highly coveted finish in both interior design and artistic domains, renowned for its elegant and timeless aesthetic. This effect involves creating a surface that mimics the appearance of natural marble stone, with distinctive veining patterns and subtle color variations that give it a luxurious and sophisticated appeal. The inherent beauty of marble lies in its intricate veins and the unique interplay of colors that can vary from soft whites and greys to warm earth tones and vibrant hues.
In interior design, the marble effect is often applied to walls, countertops, and decorative elements to impart a sense of opulence and discerning taste. The tactile characteristics of a marble effect surface add to its allure; the smooth, polished finish can enhance the texture and depth, making spaces feel more expansive and refined. The use of marble effect in art adds a layer of complexity and realism, transforming simple canvases or sculptures into works that convey the grandeur of natural stone.
Mithila paints have emerged as a popular medium to achieve the marble effect due to their high quality and versatile application. This brand offers an extensive palette of colors and specialized additives that help in replicating the intricate nuances of real marble. Techniques such as feathering and veining are employed to mimic the natural patterns seen in genuine marble slabs. The application process involves layering different tones and hues, followed by the strategic manipulation of the paint to create that signature veining effect. Additives such as glazing compounds and metallic accents can further enhance the realism and depth, contributing to a more authentic marble-like appearance.
The use of Mithila paints allows for creative flexibility and customization, making it possible to tailor the marble effect to match various design preferences and color schemes. By incorporating cutting-edge techniques and quality materials, achieving a stunning marble effect becomes accessible to both professionals and DIY enthusiasts, enabling them to transform ordinary surfaces into extraordinary visual statements.
Materials and Tools Required
To achieve the desired marble effect with Mithila paints, it is essential to gather all the necessary materials and tools. This not only ensures a smoother workflow but also significantly impacts the final result. Below is a comprehensive list of what you will need:
Mithila Paints: The core of this project, Mithila paints come in various shades that bring out the intricate details of the marble effect. Opt for high-quality paints to ensure vibrancy and longevity.
Brushes: A variety of brushes, including flat, round, and fan brushes, are crucial for different painting techniques and blending methods. Using the right brush can make a substantial difference in the precision and detailing of the effect.
Sponges: Natural or synthetic sponges are essential for creating the unique texture of marble. They help in applying paint layers and blending colors seamlessly to create an authentic look.
Masking Tape: This is vital for creating clean lines and protecting adjacent surfaces. High-quality masking tape ensures that the paint does not bleed and maintains the crispness of the design.
Gloves: Disposable gloves protect your hands from paint and other chemicals. They’re particularly useful to prevent direct skin contact with potentially harmful substances.
Protective Coverings: Use drop cloths or plastic sheeting to cover floors and furniture, protecting them from accidental spills and splatters. This ensures a clean working environment and eases post-project clean-up.
Mixing Palettes: Pallets or mixing trays are used to combine colors and create the perfect shades necessary for a realistic marble effect. Ensure they are easy to clean and large enough to accommodate multiple blends.
Additional Items: Having clean water for rinsing brushes, paper towels for cleaning up spills, and a palette knife for mixing and application will streamline your working process.
The importance of using high-quality materials cannot be overstated. Investing in superior Mithila paints and tools will not only enhance your craft but also ensure the durability and beauty of the final marble effect.

Preparing Your Surface
Proper surface preparation is vital for achieving a stunning marble effect with Mithila paints. A well-prepared surface ensures optimal paint adherence and a smooth, professional finish. The preparation process commences with thorough cleaning of the surface, which is essential for removing dirt, grease, and any loose particles. Using a mild detergent mixed with water, scrub the surface gently and rinse it off with clean water. Allow the surface to dry completely before proceeding to the next steps.
If the surface is rough or has imperfections, sanding may be required. For walls, use a medium-grit sandpaper to smooth out any uneven areas. For wood surfaces, start with a coarser grit and gradually move to a finer grit for a polished finish. In the case of canvas, ensure the material is taut and free from wrinkles. Sanding not only smoothens the surface but also helps the primer to adhere better.
Applying a primer is an indispensable step, as it acts as a bonding agent between the surface and Mithila paints. Choose a primer that is compatible with the type of surface you are working on. For walls, an acrylic primer is usually sufficient. Wood surfaces benefit from a shellac-based primer, while canvas typically requires a gesso primer. Apply the primer evenly with a brush or roller, ensuring full coverage. Allow the primer to dry according to the manufacturer’s instructions, which usually takes a few hours.
After the primer has dried, inspect the surface for any remaining imperfections. If needed, perform a light sanding again to achieve an ultra-smooth texture. Different surfaces may necessitate specific considerations for optimal paint adherence. For example, when working with glossy surfaces, such as glass or tile, using a deglosser or an etching primer can help create a gritty texture for better paint adhesion.
In summary, careful preparation of your surface is crucial for a successful marble effect. From cleaning and sanding to priming, adhering to these steps will lay the foundation for a smooth, beautiful finish that highlights the unique characteristics of Mithila paints.
Basic Techniques for Marble Effect with Mithila Paints
Creating a stunning marble effect with Mithila paints involves mastering several basic techniques essential for achieving a realistic and eye-catching finish. These techniques include color blending, layering, and veining. When applied meticulously, these methods can transform any surface into a sophisticated marble-like masterpiece.
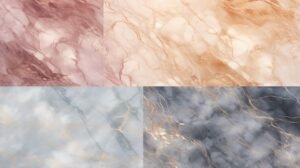
Firstly, color selection is critical. Choose a base color that mimics natural marble, such as white, off-white, or light gray. For the veins, opt for contrasting yet harmonious colors like black, dark gray, or subtle hints of blue and green. To begin, mix Mithila paints with a mixing medium in the right ratios to achieve the desired consistency. A ratio of 2:1 (paint to medium) usually works well, providing the right viscosity for both blending and veining.
The next step involves laying down the base coat. Apply the chosen base color using a broad brush or roller to cover the entire surface evenly. Allow this coat to dry thoroughly before proceeding to the next stage, which typically takes about 24 hours depending on the paint type and environmental conditions. This foundational layer serves as the canvas for subsequent techniques.
Once the base coat is dry, proceed with color blending. Using sponges or soft brushes, begin applying secondary colors by dabbing or lightly sweeping them across the surface. Blend these colors seamlessly with the base coat for a natural stone appearance, taking care to avoid harsh lines or abrupt transitions. Practice blending on a sample surface to perfect the technique before applying it fully.
For the veining effect, employ a fine brush or a feather dipped in the chosen veining color. Draw irregular, thin lines across the surface, tracing the natural lines found in real marble. These lines should be random and varying in thickness for an authentic look. If needed, soften edges with a damp sponge to integrate the veins into the background seamlessly.
Layering is another crucial technique. Once the initial veins have dried, additional layers of blended colors and veins can be added to enhance depth and realism. Ensure each layer is completely dry before applying the next to prevent smudging and preserve the distinctiveness of each paint layer.
By following these foundational techniques—selecting harmonious colors, accurate paint mixing, careful blending, and applying realistic veining—you can create a stunning marble effect with Mithila paints that rivals natural stone.
Advanced Marble Effect Techniques
Delving into advanced marble effect techniques offers a broad range of opportunities to create sophisticated and luxurious finishes with Mithila paints. These techniques go beyond simple paint application, introducing methods like faux finishing, integrating additional mediums, and the artistic incorporation of gold leaf or other decorative elements.
Faux finishing is one such technique that aims to replicate the intricate elegance of real marble. To achieve this, start by preparing your surface with a primer and base coat. Once the base is dry, use a sea sponge or crumpled plastic wrap to dab on a secondary color, creating a mottled effect mimicking marble’s natural veining. Afterward, employ a fine-tipped brush to add delicate, intricate veins in a contrasting color. This layering process adds depth and realism, transforming a simple surface into a marble masterpiece.
Incorporating additional mediums can further enhance the marble effect. For instance, using gel mediums or glazing liquids allows for greater control over the paint’s translucency, enabling the creation of subtle, multi-dimensional layers. These mediums slow the drying process, granting more time to manipulate paint and achieve desired effects. Applying thin layers of differently tinted glazes helps build a rich, lustrous finish that mirrors real marble.
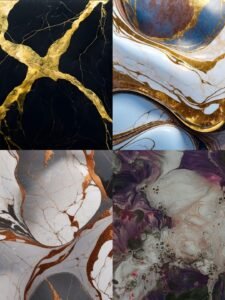
Another sophisticated approach is the inclusion of gold leaf or other decorative elements. Gold leaf, when applied judiciously, adds an opulent touch to the marble effect. To do this, first apply an adhesive size to the areas intended for gold leaf. Once tacky, gently lay the gold leaf sheets down and smooth them out. Any excess can be removed with a soft brush. The reflective quality of gold leaf, combined with the layered marble effect, creates an exceptionally luxurious outcome.
Practicing these advanced techniques is key to mastering them. Start with smaller projects to build confidence and proficiency. Take notes on the process and outcomes, adjusting methods as needed to achieve the desired results. The main difference between basic and advanced methods lies in the complexity and depth of the final effect. While basic techniques may provide a satisfactory marble appearance, advanced methods elevate the finish to a high level of artistry and sophistication.
Common Mistakes and How to Avoid Them
While creating the marble effect with Mithila paints can yield stunning and professional-looking results, it is essential to be aware of common mistakes that both beginners and even experienced artists may encounter. Understanding these pitfalls and their solutions can help in achieving the desired marbled finish without unnecessary frustration. Here are some prevalent errors and effective ways to avoid them.
One of the most frequent mistakes is uneven veining. Veins in a marble effect should look natural and random, but many artists tend to create patterns that appear too systematic or repetitive. To avoid this, practice freehand veining on a separate sheet before applying it to your main project. Utilize varying pressure on your brush or tool to create lines of different thicknesses and lengths.
Improper color blending is another common issue. A realistic marble effect hinges on beautifully blended colors. To fix this, always thoroughly mix your colors before application, ensuring you have a consistent and harmonious palette. Use a damp brush or sponge to lightly blend the edges of different colors on the surface, resulting in a seamless transition.
Paint cracking is often caused by applying thick layers of paint without allowing proper drying time between coats. It is crucial to apply thin layers of Mithila paints, building up the color gradually. Ensure each layer is completely dry before adding the next to maintain the integrity of the surface. If cracking does occur, lightly sand the area with fine-grit sandpaper and reapply a thin layer of paint.
Sometimes, despite all precautions, mistakes happen. In such cases, it is helpful to have troubleshooting tips at hand. For example, if your veins look too harsh, a slightly damp cloth can help soften them. If colors appear too muddy, reintroducing some white or a neutral base color can help regain balance. Small corrections can often save a project without the need to start over.
By being aware of these common mistakes and employing the recommended preventive measures, you can enhance your skills in creating the enchanting marble effect with Mithila paints, ensuring each project turns out beautifully.
Finishing Touches and Sealing Your Work
Once you have created the desired marble effect using Mithila paints, the final steps are crucial to ensuring that your work looks polished and remains protected over time. Begin by adding any last-minute details to enhance the overall appearance. This could involve refining the veins or patterns of the marble look to achieve a more realistic finish. Use a fine brush and subtle strokes for these final touches. Afterward, clean up the edges of your piece to ensure a neat and professional appearance. Carefully remove any tape or masking materials used during the painting process and trim off any uneven edges.
The next and arguably most important step is applying a sealant. Sealants serve to protect your artwork from wear, tear, and environmental factors, thus preserving the vibrant colors and intricate patterns of your marble effect. There are several types of sealants you can choose from, each offering distinct advantages. Polyurethane sealants are popular for their durability and resistance to moisture, making them ideal for surfaces exposed to a lot of water or humidity. Acrylic sealants, on the other hand, offer a quick-drying solution that retains a clear and glossy finish without yellowing over time.
To apply the sealant properly, ensure that your painted surface is completely dry and free from dust and debris. Using a clean, high-quality brush, apply an even coat of the sealant, moving in smooth, long strokes to avoid any streaks or bubbles. Allow the first coat to dry thoroughly before applying a second coat for extra protection. Always follow the manufacturer’s instructions regarding drying times and application techniques to achieve the best results.
Lastly, consider the maintenance and care of your newly created masterpiece. Regular cleaning with a soft cloth and gentle, non-abrasive cleaners will help maintain the shine and appearance of your marble effect. Avoid exposing the sealed surface to harsh chemicals or abrasive materials to prevent damage. By following these steps, you can ensure that your stunning marble effect remains beautiful and resilient for years to come.