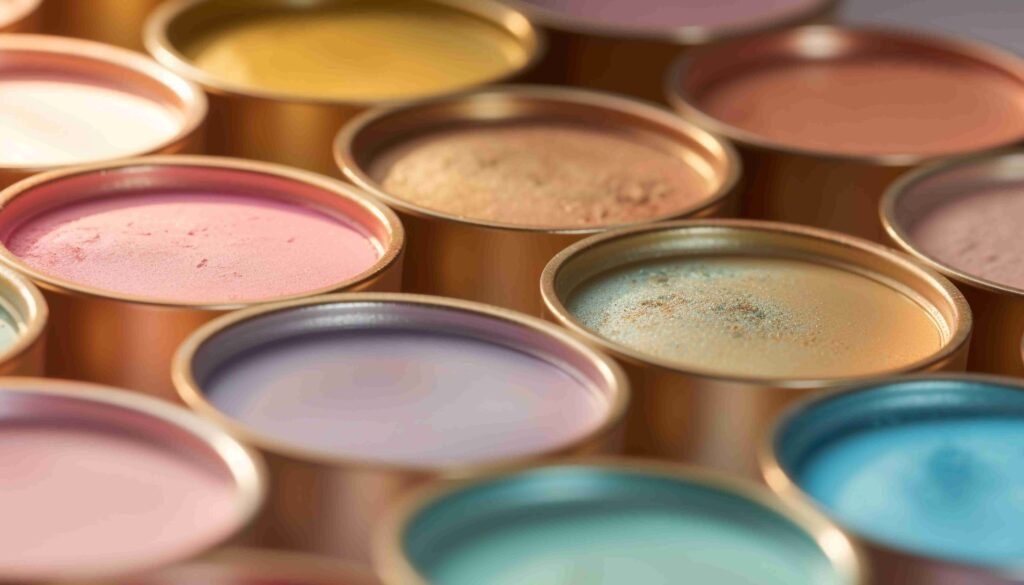
Introduction to DIY Home Texture Paint
Texture painting is an art form that transcends mere color application, offering a unique way to enhance the visual and tactile appeal of walls in residential spaces. This technique incorporates various materials and tools to create depth and dimension, transforming flat surfaces into engaging visual experiences. Over time, texture painting has gained prominence within the realm of home decor, emerging as a popular DIY trend among homeowners seeking to personalize their living environments.
The origins of texture painting can be traced back through centuries, where artists and craftsmen utilized it to add character and richness to their work. In ancient civilizations, textured surfaces often delineated the status and personality of spaces within homes. Today, the practice has evolved, offering countless styles and techniques that cater to the diverse tastes of modern homeowners. From rustic and vintage finishes to sleek and contemporary looks, texture painting represents an adaptable method for achieving custom aesthetics.
One of the key benefits of texture painting is its ability to create unique atmospheres in different rooms. For example, a soft, stucco-like finish may lend a tranquil and cozy feel to a bedroom, while a bold, jagged finish can energize a living area or studio. The interplay of light and shadow on textured surfaces amplifies the dynamism of a space, encouraging a deeper engagement with the environment. Furthermore, texture painting can help conceal imperfections in walls, providing an affordable yet impactful solution for home improvements.
As homeowners increasingly gravitate towards personal expression in their interior design choices, texture painting presents an inviting opportunity to unleash creativity. By learning the basic techniques and understanding the potential of texture, individuals can transform their living spaces into reflections of individuality and style.
Choosing the Right Materials
When embarking on a texture painting project, the selection of materials plays a crucial role in achieving the desired outcome. The foundation of any texture painting task is quality paint; latex and acrylic paints are two popular options. Latex paint is water-based, making it easy to clean up, while offering a wide array of finishes and colors. It dries quickly and is less prone to fading. On the other hand, acrylic paint provides improved durability and is ideal for artistic endeavors where vibrant colors or specialized effects are essential.
In addition to selecting the right type of paint, incorporating texture mediums can significantly enhance the depth and character of your walls. Joint compound is a common choice, as it allows for easy manipulation and creates a smooth or textured surface depending on application technique. Sand, when mixed with paint, introduces a gritty texture that can mimic stucco or plaster finishes. Other options include textured paint additives that can be stirred directly into the paint, offering additional ways to achieve unique finishes.
To effectively apply these materials, having the right tools is equally important. Brushes, rollers, and sponges each serve distinct purposes; for instance, a wide brush is ideal for creating bold strokes, while rollers are effective for covering larger areas quickly. Sponges can be utilized for softer textures and blending colors. Beyond these traditional tools, consider specialty applicators like texture combs or palette knives for intricate designs. Selecting high-quality tools will ensure longevity and improve the overall finish of your project.
Ultimately, the right combination of paint, texture mediums, and tools will set the stage for a successful texture painting experience. Investing time in materials selection not only enhances the aesthetic of your space but also significantly adds to the durability of your designs.
Popular Texture Painting Techniques
Texture painting is a versatile and creative way to enhance the aesthetics of any space. Among the numerous techniques available, sponge painting is one of the most commonly used methods. This technique involves applying paint to a surface using a natural sponge, which creates a unique, mottled effect. The variations in color can add depth and dimension to walls, making it an ideal choice for living rooms or bedrooms where a soothing atmosphere is desired.
Another favored technique is rag rolling. This approach utilizes a rag or cloth to roll paint onto the wall, resulting in a subtle textured finish. It is particularly effective for achieving a soft, rustic look and works wonderfully in dining rooms or hallways where a warm ambiance is desired. By experimenting with different colors, homeowners can customize the look to suit their specific decor.
Stucco effects are a classic choice for those aiming to replicate the look of plastered walls. This technique involves applying a thick layer of paint that mimics the appearance of traditional stucco, often used in Mediterranean-style homes. It can add a timeless quality to entryways or outdoor areas, creating an inviting atmosphere. This effect can be achieved using specialized tools, such as a trowel, to impart texture before the paint dries.
Other popular methods include combing and stippling, which are great for producing intricate designs and patterns. Combing involves dragging a comb through wet paint, while stippling utilizes a brush to create small dots that add dimension. These techniques are well-suited for accent walls or smaller spaces where unique visual interest is desired.
By exploring these various texture painting techniques, individuals can discover the best option for their projects, allowing them to transform their space into a personalized and visually captivating environment.
Prepping Your Walls for Texture Painting
Preparing your walls for texture painting is a critical step that can significantly influence the outcome of your project. Proper wall preparation is essential to achieve a professional finish and ensure the longevity of your textured design. To start, thoroughly clean all surfaces to remove dust, dirt, and grease. This can be accomplished with a mixture of water and a mild detergent. Employ a soft sponge or cloth to wipe down the walls, ensuring all particles or residues are completely removed. Once cleaned, allow the walls to dry completely.
Next, assess the condition of the wall surface for any imperfections such as cracks, holes, or peeling paint. These issues can compromise the ability of the texture to adhere properly. Use a suitable filler to repair any holes or cracks, smoothing the surface with a putty knife for an even finish. If the existing paint is flaking, it is wise to scrape it off to ensure the new texture adheres effectively. After repair work is completed, sand the affected areas lightly to blend them with the surrounding surface.
Following repairs, it is advisable to apply a base coat of paint. A coat of primer can be particularly beneficial as it not only provides a uniform surface but also helps the texture material to bond effectively. Choose a paint or primer that suits the type of texture you plan to apply. Once the base coat is dry, ensure proper ventilation in the room. Good airflow will help expedite the drying process of both the primer and the texture paint, enhancing the overall results of your project. Ultimately, a well-prepped wall will serve as a sturdy foundation for your creative texture painting endeavors.
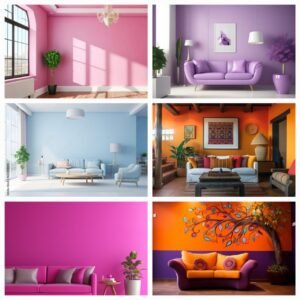
Incorporating Color in Texture Painting
Color choices play a pivotal role in enhancing the overall effect of texture painting in any space. Understanding the basics of color theory is essential for creating a harmonious environment. Color theory involves the color wheel, which includes primary, secondary, and tertiary colors. Utilizing complementary colors—those that are opposite each other on the color wheel—can create striking contrasts, while analogous colors—those adjacent to each other—result in soothing combinations. Recognizing these relationships allows for informed selections that visually amplify texture.
When selecting a color palette to complement your home decor, consider factors such as the room’s purpose, existing furnishings, and lighting. For instance, warmer tones like reds and yellows can infuse a lively ambiance in social settings, whereas cooler shades, such as blues and greens, may promote relaxation in bedrooms. Additionally, neutral colors provide a versatile backdrop, allowing for bold textured applications without overwhelming the senses.
Layering different colors is another effective technique to add depth and interest to texture painting. By applying multiple hues in varying opacities, one can achieve a rich, dimensional look. For instance, a base layer of soft cream might be topped with a semi-transparent wash of taupe or sage, resulting in a visually engaging surface that invites exploration. This method not only enhances the tactile quality of the paint but also fosters a nuanced color experience that changes with light exposure throughout the day.
Ultimately, the relationship between texture and color provides endless opportunities for creative combinations. Embracing this connection can transform ordinary walls into stunning works of art, enhancing the overall atmosphere of your home. Whether through subtle gradients or bold contrasts, a well-thought approach to color in texture painting can elevate your living space significantly.
Step-by-Step DIY Texture Painting Projects
Transforming your space through creative DIY texture painting projects can significantly enhance your home’s aesthetic. Below, we provide detailed steps for three unique texture painting ideas: a faux leather wall, a textured ombre effect, and a rustic stucco finish. Each project includes a comprehensive list of materials, necessary prep work, application techniques, and finishing touches.
Faux Leather Wall
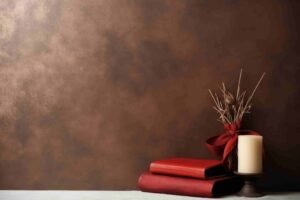
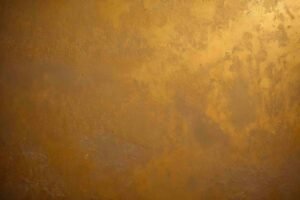
To achieve a faux leather look, gather the following materials: paint in a rich brown hue, a foam roller, a stippling brush, and clear satin varnish. Start by preparing the wall by cleaning it thoroughly and using painter’s tape to mask off edges. Apply a primer suitable for the paint color chosen and let it dry.
Next, mix your paint with a glaze medium to create depth. Using the foam roller, apply an even layer of this mixture. Once dry, use the stippling brush to create small textured patterns, mimicking the look of leather. After the texture has fully dried, seal your work with a clear satin varnish to protect and enhance the appearance.
Textured Ombre Effect
For this project, the materials required include several paint colors in a gradient range, brushes, a sponge, and painter’s tape. Begin by selecting your color palette and preparing the wall as previously described. Apply painter’s tape to mark off the areas you want to keep untouched.
Start with the lightest shade at the top and gently work your way down with a brush or sponge, applying the next darker shade as you go. Blend the colors seamlessly by overlapping them while they are still wet. Continue this process until you reach the desired depth at the bottom and allow the background to dry completely.
Rustic Stucco Finish
To create a rustic stucco finish, gather materials such as joint compound, a trowel, and drywall sandpaper. Prepare the wall by removing any old paint and ensuring the surface is clean. Apply a base coat of paint before introducing the joint compound. Using the trowel, spread the compound onto the wall in a textured motion to create a rustic appearance. Allow it to dry completely before lightly sanding for added texture. Finally, paint over the stucco with your desired color.
These DIY texture painting projects not only add complexity to your walls but also provide a canvas for personal expression, enhancing the overall beauty of your home.

Maintenance and Care for Texture Painted Walls
Once texture painting is complete, proper maintenance plays a crucial role in ensuring long-lasting beauty and integrity of the walls. Texture painted walls are unique due to their three-dimensional patterns, which can attract dust and grime more readily than flat surfaces. Regular upkeep not only enhances their aesthetic appeal but also protects the integrity of the paint and the texture.
To maintain the cleanliness of texture painted walls, start with gentle cleaning methods. A soft cloth or sponge, lightly dampened with water, is often sufficient for routine dusting. For more stubborn stains, a mild detergent mixed in warm water can be used. It’s advisable to avoid overly abrasive cleaning tools or harsh chemicals, as these may damage the textured surface. Instead, employ a light foaming action to lift dirt without abrasion.
When dealing with dirt buildup or stains specific to certain areas, use a soft-bristled brush to navigate the intricacies of the texture without causing harm. Always test any cleaning solution on an inconspicuous area to ensure it does not alter the color or finish of the paint. Additionally, be conscious of the humidity levels in your home; too much moisture can affect the finish on the walls, leading to peeling or mold growth.
In terms of touch-ups, inspect your walls periodically for areas that may need reapplication. Addressing chips or fading promptly can help maintain a seamless look that highlights the artistic elements of your texture painting. In conclusion, consistent care and gentle cleaning methods are essential in preserving the charm and appearance of texture painted walls, allowing your home to exude a beautifully crafted ambiance for years to come.
Inspiration Gallery: Successful Texture Painting Examples
Texture painting has gained immense popularity among homeowners looking to inject personality and interest into their living spaces. This section serves as an inspiration gallery, showcasing remarkable before-and-after examples of successful texture painting projects. By highlighting diverse techniques, we aim to motivate readers to envision how texture can transform their own homes.
In one remarkable transformation, a once-plain living room was revitalized with a stunning sponge painting technique. Before the project, the walls were characterized by a monotonous hue, which gave the space a drab appearance. After the application of a carefully chosen color palette and the sponge technique, the walls exhibited dynamic energy and depth, inspiring a cozy yet lively atmosphere. Homeowner Jane Smith remarked, “The transformation has completely changed the feel of our home. It feels like a work of art now!”
Another striking example features a dining room that embraced a more rustic aesthetic through the use of a brushed technique. Here, the original flat wall was adorned with layers of muted colors that created an inviting texture reminiscent of vintage farmhouse style. The technique not only added visual interest but also complemented the wooden furnishings, elevating the overall ambiance. Owner John Doe testified, “We often receive compliments on our dining area. The texture adds character without being overwhelming.”
Moreover, an exploration of 3D textures using joint compound revealed jaw-dropping results in a contemporary bathroom. This technique provided a unique tactile experience, enhancing the room’s modern feel. Homeowner Lisa Johnson noted, “The texturing process was easy, and the final effect truly exceeded my expectations. It feels like a spa now!”
These examples illustrate how texture painting can enhance any space, showcasing the versatility of techniques and the personal satisfaction that comes from customizing one’s home environment. Readers are encouraged to embrace these inspiring stories as they consider their own texture painting projects.
Conclusion: Unleashing Your Creativity Through Texture Painting
In the realm of home decors, texture painting presents a unique opportunity to express individuality and artistic flair. Throughout this blog post, we have explored various creative DIY techniques that can significantly enhance the aesthetic appeal of your living spaces. From sponging to rag-rolling and combing, each method offers a distinct visual effect that contributes to a more personalized atmosphere. By engaging in such projects, you have the chance to transform dull walls into stunning focal points that reflect your style.
Texture painting not only adds depth and interest to surfaces but also serves as a canvas for your creativity. The process allows for experimentation with colors, patterns, and techniques that can breathe new life into any room. As you’ve seen, even simple tools and readily available materials can yield extraordinary results when applied thoughtfully. This is a prime example of how DIY projects, especially in the realm of texture painting, can cultivate confidence in homeowners, encouraging them to take charge of their spaces.
Moreover, embracing texture painting can foster a greater connection to your home. Each brush stroke or sponge dab serves as a reminder of your creativity and effort, resulting in an environment that feels uniquely yours. Whether you choose to create subtle nuances or bold statements, the impact of texture on the overall design cannot be understated. As you embark on your journey towards texture painting, remember the infinite possibilities that lie ahead; you have the power to turn any part of your home into a reflection of who you are.
Ultimately, texture painting is more than just a decorative choice; it is an effective way to elevate your living space and infuse it with personality. So gather your supplies, unleash your creativity, and start your DIY adventure today!


