
Texture Walls With Step-by-Step Guide
Introduction to Texture Walls
Texture walls are a distinctive element in modern interior design, offering an alternative to traditional smooth wall finishes. Unlike smooth walls, which provide a flat and uniform appearance, texture walls feature various patterns and surface variations that add depth and character to a space. This stylistic choice not only enhances the overall aesthetics of a room but also introduces visual interest, making it a popular preference among homeowners and designers alike.
One of the primary advantages of opting for texture walls is their ability to conceal imperfections. Walls often bear the marks of time, such as cracks, dents, or uneven surfaces. A textured finish can mask these flaws effectively, creating a polished look without extensive repairs. This quality makes texture walls a practical solution, especially in older homes where wall conditions may not be ideal.
Furthermore, texture walls can contribute to a more inviting and warm atmosphere. They generally create a tactile experience, encouraging interaction and engagement with the visual elements of a room. Whether it’s a lightly stippled design or a more pronounced raised texture, these surfaces can affect how light interacts with the walls, altering the mood of the space throughout the day.
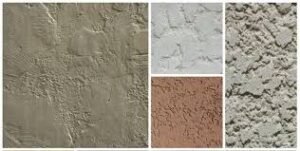
Various types of texture finishes are available, each offering a unique style and effect. Some popular options include knockdown, slap brush, and sponge finishes, each varying in techniques and results. Additionally, these textures can be applied using different materials like plaster, drywall compound, or paint, allowing homeowners to customize their finishes according to personal preferences and existing decors. Embracing texture walls can significantly enhance your living space, transforming it into a visually dynamic environment.
Essential Tools and Materials Needed
Creating textured walls requires a systematic approach that starts with gathering the appropriate tools and materials necessary for the task. The first crucial item on the list is high-quality paint and primer. Selecting the right paint is fundamental, as it not only influences the final appearance of the texture but also its durability.
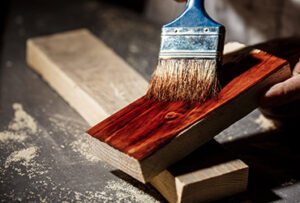
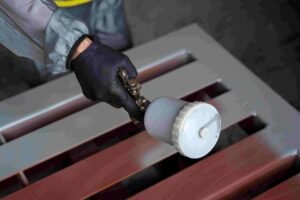
Next, consider the variety of application tools available for designing textured walls. A set of brushes in different sizes will provide versatility for intricate patterns, while rollers are vital for larger areas. Roller brushes with unique textures can contribute to distinctive surface patterns, allowing for creative expression. Additionally, spatulas and trowels will be integral for applying thicker textures and for creating smooth finishes. A paint sprayer can also be a worthwhile investment, as it can quickly cover extensive areas, offering a uniform texture.
Another essential component in this process is protective gear. Safety goggles and masks should not be overlooked to safeguard against dust and fumes that may arise during the application. Wearing gloves is also recommended to protect hands from paint chemicals. It is crucial to establish a safe workspace by laying down drop cloths or plastic sheeting. This will help in managing spills and ensuring that the surrounding areas remain clean throughout the texture application process.
By equipping oneself with the appropriate tools and materials, one can significantly enhance the efficiency and outcome of the textured wall project. The right choices can lead to improved results and a more enjoyable experience while mastering the art of texture walls.
Preparing the Wall Surface
When embarking on a project to create texture walls, adequate preparation of the wall surface is essential to ensuring a successful outcome. The first step in preparing your wall is to thoroughly clean the surface. Remove any dust, dirt, or grease using a mild detergent solution and a sponge or cloth. This cleaning process helps to enhance the adhesion of the texture material, facilitating a more durable finish.
Next, examine the wall for any cracks, holes, or imperfections that need to be addressed. Small holes can be filled using spackle, while larger gaps may require a more substantial repair solution such as joint compound. It is important to apply these fillers properly; smooth them over the surface using a putty knife and allow them to dry completely before proceeding. Once dry, these areas should be sanded down to create a uniform surface that is level with the surrounding wall.
After addressing any imperfections, the next step is to prepare the wall with a suitable primer. Choosing the right primer is crucial as it not only enhances adhesion but also helps to prevent peeling and flaking of the textured surface. A high-quality water-based or oil-based primer is often recommended, depending on the final texture material and wall surface. Apply the primer using a roller or brush, ensuring an even coat across the entire wall. Allow the primer to dry fully according to the manufacturer’s instructions before moving on to the texture application.
In summary, following these preparation steps—cleaning, patching, sanding, and priming—will greatly improve the outcome of your texture walls. A well-prepared surface provides a solid foundation for the texture application, ultimately leading to a more professional and appealing finish.
Exploring Different Texture Techniques
When it comes to enhancing the aesthetics of a room, texture walls play a pivotal role. There are various techniques available, each offering a unique visual appeal and atmosphere. Understanding these methods can help you choose the right one for your project, ensuring that the final result aligns with your design vision.
The knockdown technique is a popular choice among homeowners and decorators. This method involves applying joint compound to the wall and then knocking it down with a trowel, creating a soft, mottled texture. To achieve this look, you will need a spray gun, joint compound, and a trowel. The application begins with a spray of the joint compound, which is then flattened with the trowel in a sweeping motion. This technique not only adds depth to surfaces but also helps hide imperfections in the wall, making it an ideal choice for residential spaces.
Another interesting technique is the slap brush method. This involves using a specialized brush or a paint roller with a textured cover. The process begins by applying a base coat and then using the slap brush to create dimension. The brush’s bristles leave distinctive patterns, adding visual interest and character to the wall. This method works well in informal settings, providing a rustic or cottage-like ambiance.
The sponge technique is yet another option that produces a softer, more subtle texture. Using a damp sponge, you can dab paint onto the wall to create a sponge-like appearance that mimics the look of fabric or clouds. This technique is particularly suitable for creating a serene atmosphere in spaces like bedrooms and bathrooms. It allows for color blending and layering, giving you the opportunity to achieve various effects depending on how heavily or lightly the sponge is applied.
Incorporating these texture techniques into your design can transform the visual dynamic of your space. Each method not only alters the appearance but also impacts the overall feel of the room. By considering the tools required and the effects produced, you can select the perfect texture technique that aligns with your renovation goals.
Step-by-Step Application Process
Applying texture to walls can transform a plain surface into an engaging focal point. It starts with selecting the right texture compound. The most common types include premixed compounds and powders that require mixing with water. If you choose a powder, follow the manufacturer’s instructions for the correct ratio of water to compound to ensure a consistent mixture. It’s important to achieve a creamy, workable texture that isn’t too runny or overly thick.
After mixing the compound, prepare your walls by ensuring they are clean and free of dust. If necessary, repair any holes or imperfections to create a smooth base. Use painter’s tape to outline areas that you wish to keep untextured, such as trim and door frames. Once the surface is prepped, use a putty knife or trowel to apply the texture compound. Dip your chosen tool into the compound and spread it on the wall with even pressure. Aim for a thickness of about 1/8 inch to achieve the desired look without it sagging or cracking during drying.
For larger rooms, it can be beneficial to work in sections, allowing yourself to maintain a wet edge as you apply the texture. This will help in blending the seams and avoiding visible lines. For corners and edges, a smaller tool like a brush may be necessary to create a seamless transition. Once the texture is applied, you can experiment with finishing techniques. Options include using a sponge for a soft look, or a brush for a more pronounced pattern. Allow the texture to dry completely according to the product guidelines before moving on to painting or sealing. Proper application is key to achieving a professional finish that enhances the overall aesthetic appeal of your space.
Tips for Achieving a Professional Finish
Achieving a professional finish on textured walls requires careful attention to detail and an understanding of the techniques involved. One of the most common mistakes encountered is rushing through the application process. Taking the time to prepare the surface properly ensures better adhesion and a more uniform appearance. Begin by thoroughly cleaning the walls and repairing any imperfections, such as cracks or holes, to provide a smooth base for the texture.
Maintaining a consistent pattern is crucial for a cohesive look. When using tools like brushes, rollers, or sponges, practice on scrap material to grasp the right technique and pressure required. This way, you can achieve an even depth and minimize variations in texture. It’s also beneficial to measure and mark your work area, allowing you to track where you are applying texture and ensuring that the pattern remains uniform throughout.
Another essential tip is to blend or match textures in adjoining areas effectively. When transitioning from one wall to another or meeting different textures, it is vital to feather the edges where the two meet. This can be accomplished by lightly overlapping textures as you go, which creates a seamless blend and eliminates harsh lines. Pay close attention to your choice of tools, as different instruments can yield various textures, and selecting the right one will enhance the final appearance.
Finally, do not underestimate the importance of finishing touches. Once the texture is applied, allow adequate drying time before inspecting for any inconsistencies or imperfections. If necessary, touch up areas using the same technique. A careful review of your work will pay off, providing a polished, professional finish that enhances the aesthetics of your space.
Maintaining and Cleaning Texture Walls
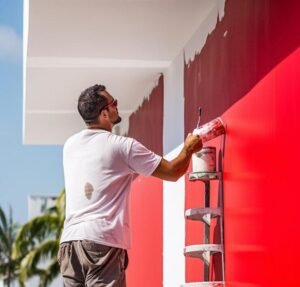
The maintenance and cleaning of textured walls are crucial for ensuring their durability and continuing aesthetic appeal. Textured walls, which can add depth and character to a space, may accumulate dust, grime, or stains over time. To effectively clean these surfaces while preserving their texture, a systematic approach is recommended. Initially, use a soft-bristled broom or a vacuum with a brush attachment to gently remove dust and cobwebs from the surface without causing abrasion. Regular dusting helps maintain the wall’s display and prevents grime buildup.
For deeper cleaning, select a suitable cleaning solution. Mild detergents mixed with warm water are often the safest choice for textured walls. Avoid harsh chemicals as they can damage the finish and texture. To apply the cleaner, use a soft sponge or cloth, lightly dampened to prevent water from seeping into the texture. Begin from the top and work downwards to avoid streak marks. After applying the cleaner, rinse with a clean damp cloth to remove any residue, ensuring that no soap is left behind which could attract more dirt.
In the event of minor damages, such as scratches or dents, repair kits specifically designed for textured walls can be extremely useful. These kits often include joint compound and texture spray that mimics the original finish. To touch up, clean the damaged area, apply the compound, and once dry, spray the texture to blend it in with the surrounding wall. Furthermore, it is prudent to inspect your textured walls periodically for issues such as peeling or loss of adherence and address them promptly to maintain the overall integrity of the wall surface. Regular care and attention will greatly extend the life and appearance of your textured walls.
Inspiration and Examples of Texture Wall Designs
Texture walls can add significant depth and character to any room, transforming the overall ambiance and aesthetic appeal. There are numerous styles of textured walls, each offering distinct looks that can complement various interior design themes. This section provides inspiration through several examples of texture wall designs that can ignite creativity in readers looking to embark on their own projects.
One popular texture wall style is the rustic finish, often achieved with reclaimed wood planks. This design not only evokes a cozy atmosphere but also brings a touch of nature indoors. The natural color variations in the wood can be paired with muted tones in furniture and decor, creating a harmonious and inviting environment. Rustic textured walls work exceptionally well in living rooms, dining areas, or even bedrooms, adding warmth without overwhelming the space.
For those drawn to a more contemporary aesthetic, a smooth stucco finish or a modern plaster wall can provide sleek sophistication. This style, typically rendered in neutral palettes like whites and greys, serves as a perfect backdrop for bold colored furnishings or artistic decors. In a minimalist setting, textured walls can introduce an element of intrigue while maintaining a clean, clutter-free appearance, ideal for spaces like home offices or modern lofts.
If you are seeking something unique, consider geometric patterns achieved through painted textures or 3D wall panels. These eye-catching designs can serve as statement walls, creating focal points in living rooms or bedrooms. By experimenting with color combinations—from vibrant hues to subtle pastels—one can achieve a playful yet elegant look. Adding plants or decorative pieces against these textured backgrounds enhances visual interest, making your space feel inspiring and alive.
Conclusion and Final Thoughts
In wrapping up our comprehensive guide to mastering texture walls, it is essential to reflect on the key points covered throughout this tutorial. We began by discussing the various types of texture techniques available, such as knockdown, stucco, and brush textures, each offering unique aesthetic appeal and atmosphere to your living spaces. The importance of proper surface preparation was emphasized, as it serves as the foundation for achieving a seamless and attractive finish. We also highlighted the tools required for the project, from trowels to rollers, ensuring you are well-equipped for the task.
As we explored step-by-step procedures, applying texture to walls can seem daunting initially, but with patience and practice, the process becomes more manageable. Techniques like the slap brush or sponge application are not only effective but can also be enjoyable. Experimenting with different textures allows you to personalize your living environment, opening doors to creativity while enhancing the overall ambiance of your space.
We encourage you to embark on your texture wall project with confidence, knowing that the effort invested will yield rewarding results both visually and personally. Remember, each stroke of the texture tool is a step towards transforming your walls into a reflection of your style. Should you encounter challenges, do not hesitate to revisit the tips outlined in this guide. It is through practice that you will refine your skills and techniques.
We invite you to share your experiences, questions, or successes regarding your texture wall endeavors. Engaging with fellow DIY enthusiasts can provide valuable insights and encourage others to explore the satisfying world of texture walls. Ultimately, this project allows you not just to beautify your home but also to develop new skills, fostering a sense of accomplishment.
